
Wolfpack 1/48 T-38A Talon 'ROCAF'
| KIT #: | 10010 |
| PRICE: | $40.00 delivered |
| DECALS: | Three options |
| REVIEWER: | Scott Van Aken |
| NOTES: |
| HISTORY |
The Northrop T-38 Talon is a two-seat, twin-engine supersonic jet trainer. It was the world's first supersonic trainer and is also the most produced. The T-38 remains in service as of 2025 with the USAF as many extant airframes have been modified to T-38C configuration.
 The United States Air Force (USAF) is the largest operator of
the T-38. In addition to training USAF pilots, the T-38 is used by NASA. The US
Naval Test Pilot School is the principal US Navy operator (other T-38s were
previously used as USN aggressor aircraft until replaced by the similar Northrop
F-5 Tiger II). Pilots of other NATO nations fly the T-38 in joint training
programs with USAF pilots.
The United States Air Force (USAF) is the largest operator of
the T-38. In addition to training USAF pilots, the T-38 is used by NASA. The US
Naval Test Pilot School is the principal US Navy operator (other T-38s were
previously used as USN aggressor aircraft until replaced by the similar Northrop
F-5 Tiger II). Pilots of other NATO nations fly the T-38 in joint training
programs with USAF pilots.
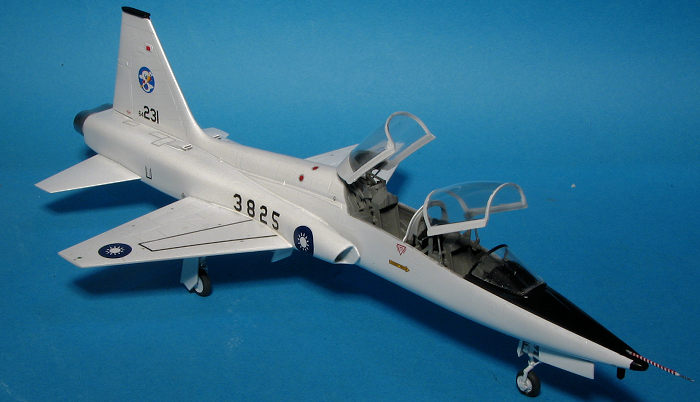
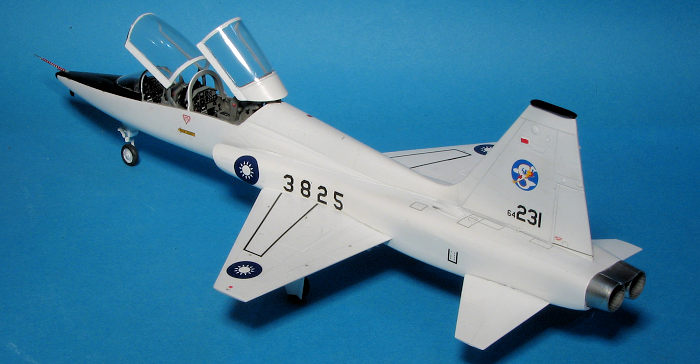
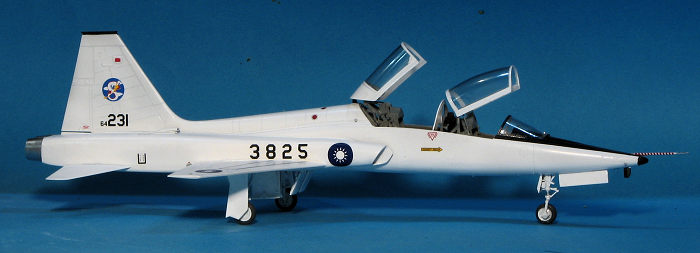
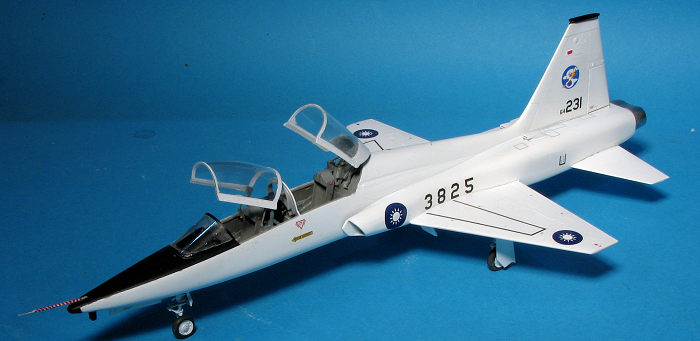
As of 2012, the T-38 has been in service for over 50 years with its original operator (the USAF). Other current and previous operators of the T-38 include Portugal, South Korea, Taiwan, Turkey and Germany. All German T-38s are kept in the US and used to train German pilots.
The Republic of China leased a number of low hour T-38As from the USAF, returning them in 1998. Many of these aircraft were refurbished and placed back in USAF service.
| THE KIT |
This kit is molded in Korea and so is typical of current standard kits such as one gets from Trumpeter, Kinetic and others. Molding is well done, though I did find ejector pin marks on many parts, including most of the tires and the inside of things like gear doors. I also found sink areas on thick parts like the outside of the speed brakes, the lower control sticks and the mechanisms that hold up the canopy. The wheel wells have nice detail in them though the outer main gear wells are devoid of detail (they just may not have any in reality).
 The cockpit comes with two nicely done ejection seats, with no
belt detail. Instrument panels have raised detailing and they have decals as
well. These panels are only for the T-38A. The T-38C has a 'glass' instrument
panel. Rudder pedals are included that attach to the instrument panels. Side
consoles are also provided. Under the cockpit tub fits the one piece wheel well.
There is room in the nose for weight if you feel the kit needs it. None is shown
in the instructions.
The cockpit comes with two nicely done ejection seats, with no
belt detail. Instrument panels have raised detailing and they have decals as
well. These panels are only for the T-38A. The T-38C has a 'glass' instrument
panel. Rudder pedals are included that attach to the instrument panels. Side
consoles are also provided. Under the cockpit tub fits the one piece wheel well.
There is room in the nose for weight if you feel the kit needs it. None is shown
in the instructions.
Intakes are a left and right side with a separate lip piece.
There is no backing plate to the intakes, but they may well not be needed. There
are two lower fuselage inserts. One is forward and the other is the entire aft
rear section that includes lower wing stubs. The kit has a single piece fin,
wings, and horizontal stab. The small flat piece atop the fin is separate.
Exhaust fit like many F-5 kits with a one-piece exhaust nozzle into which the
two tailpipes fit. Landing gear is well done and are the appropriate thin tire
version that is typical for a T-38. The kit includes the small sprue for the
AT-38B so that the modeler can use the wheels on it for one of the options. If
one has decals for the AT-38B, then one of those can be built using this kit.Gear
 doors have separate actuators as do the speed brakes. As
mentioned, these latter items have some pretty hefty sink areas on them so
you'll need to smooth that out with filler. The kit can be built with the canopy
open or closed. In the open position there are separate actuators to be used.
The only other bit included is a travel pod
doors have separate actuators as do the speed brakes. As
mentioned, these latter items have some pretty hefty sink areas on them so
you'll need to smooth that out with filler. The kit can be built with the canopy
open or closed. In the open position there are separate actuators to be used.
The only other bit included is a travel pod
| CONSTRUCTION |
As I'd never built a Wolfpack kit before, I threw caution to the wind and followed the instructions. Looking at the instructions it looked like it would be a fairly quick build as there are not a lot of steps. Cockpit is first so I assembled the seats and painted them and the interior with FS 36231, dark gull grey. There are decals for the instrument panels so those were painted and the decals applied. For some reason, the ejection seat rail is attached to the aft bulkhead of both cockpit areas. There is only a tiny nub on the floor to help with alignment. I found this lack of positive alignment features to be pretty standard with the entire kit. This was true of the instrument panels as well with only a small nub on the floor to assist.
 The nose gear well was glued into one fuselage half
followed by the by then built up interior minus the seats. There is an
alignment area for the cockpit, but only at the back. The fuselage halves
were then closed. No need for weight with this one. Next, the two lower
fuselage inserts were attached. The aft one includes the lower portion of
the wing. I found that these were both a bit wider than the area to which
they attached. Not too much of an issue at the front though it did result in
a step. For the aft section, it would have been wise to install a spreader
bar so that the part would be flush. I did not but will with the next one as
it affected the fit of the upper wings.
The nose gear well was glued into one fuselage half
followed by the by then built up interior minus the seats. There is an
alignment area for the cockpit, but only at the back. The fuselage halves
were then closed. No need for weight with this one. Next, the two lower
fuselage inserts were attached. The aft one includes the lower portion of
the wing. I found that these were both a bit wider than the area to which
they attached. Not too much of an issue at the front though it did result in
a step. For the aft section, it would have been wise to install a spreader
bar so that the part would be flush. I did not but will with the next one as
it affected the fit of the upper wings.
I then built up the exhaust and after checking the fit, set it aside until after painting. It will be painted stainless steel and exhaust. Since the aircraft will be overall white, I installed the landing gear. As with many parts of the kit, the lack of really positive attachment points made both the nose and main gear fairly wobbly until all the glue dried. Then the nose gear door and inner main gear doors were attached. The inner gear door actuation pistons have very thin parts that broke when being removed from the sprue.
In the back, the upper fuselage scoops were glued in place. These are simple butt joined and have no solid indication of where they are to go. I'm not sure how difficult it would have been to put a small tab on the scoops and an indented area on the fuselage, but this would have been a big help. Then I moved forward to deal with the clear bits. I had been warned that the fit was not good if doing the canopies closed. While I had no issues getting the two canopies in place, the windscreen was too short. Despite trimming it back, I still didn't get the fit I liked. I fixed the windscreen in place and tacked on the two canopies as I wanted to do those raised. They were then masked with the kit supplied mask set.
| COLORS & MARKINGS |
 Painting of most T-38s is pretty simple. For most of their
life they have been overall white with black anti-glare panels. I first
sprayed on a matte white primer to give the gloss white something to attach
itself. Then I used Tamiya gloss white for the rest of the airframe. Parts
were masked off and painted black while the exhaust area was painted with
Alclad II.
Painting of most T-38s is pretty simple. For most of their
life they have been overall white with black anti-glare panels. I first
sprayed on a matte white primer to give the gloss white something to attach
itself. Then I used Tamiya gloss white for the rest of the airframe. Parts
were masked off and painted black while the exhaust area was painted with
Alclad II.
I used the kit decals for one of the three very similar options. The placement guide is not that good for the various stencils as it doesn't identify all of them. One can figure out where they go with a bit of sleuthing. The very small 'no step' decals are shown going on both sides of the wing walk decal. This can't be right so I left off the ones inside the walk area.
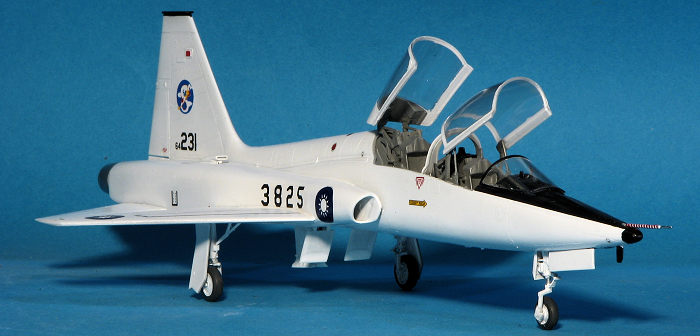
Next I attached the main and nose wheels along with the outer gear doors. The canopies were next. I wanted them open on this model and this turned out to be one of the bigger headaches. There is no positive attachment point on either the canopy or the cockpit for the front canopy. The little nubs on the canopy are woefully inadequate and the instructions are not at all clear on where the actuator fits in the cockpit. Fortunately, this is not the case for the rear and I had little issue getting that in place. The pitot tube was attached, the masks removed and that was it for this one.
| CONCLUSIONS |
I've now built all the 1/48 T-38 kits. The Sword was the most difficult, the Trumpeter the easiest, and this one is probably the most accurate of the three. Fortunately, I learned a lot from this one as I have several more in the stash. One thing for sure, I will NOT be building it with open canopies.
| REFERENCES |
http://en.wikipedia.org/wiki/T-38_Talon
23 February 2024
Copyright ModelingMadness.com. All rights reserved. No reproduction in
part or in whole without express permission from the editor. If you would like your product reviewed fairly and
fairly quickly, please
contact
the editor
or see other details in the
Note to
Contributors.