Hobby Boss 1/72 F-86F-40 Sabre
|
KIT #: |
80259 |
|
PRICE: |
25 yuan RMB |
|
DECALS: |
Two options |
|
REVIEWER: |
Richard F |
|
NOTES: |
|
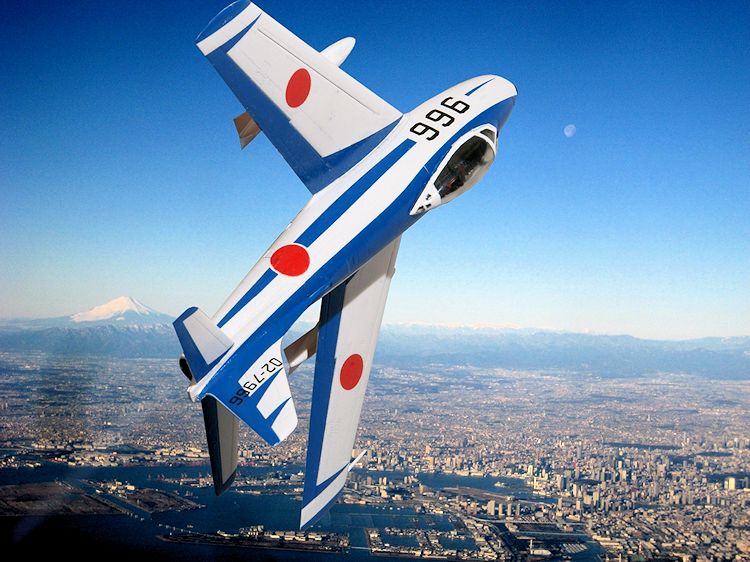
The Blue Impulse aerobatics team made its international debut at the Tokyo
Olympics in 1964, painting the Olympic rings in the sky. It had first formed
back in 1960, supposedly after Japanese air force commanders watched a demo by
the USAF Thunderbirds.
The team flew five F-86F jets for two decades (1960-81) before switching to the
Mitsubishi T-2, and then the Kawasaki T-4 in 1996.
 Japan's Air
Self Defence Force had a large fleet of F-86Fs, acquired from the mid-1950s and
licence built by Mitsubishi. A few were converted to recon birds (you can see my
review of the Fujimi JASDF RF-86
right
here on MM.
Japan's Air
Self Defence Force had a large fleet of F-86Fs, acquired from the mid-1950s and
licence built by Mitsubishi. A few were converted to recon birds (you can see my
review of the Fujimi JASDF RF-86
right
here on MM.
As for the F-86 itself, most modellers would know the basics. First decent swept
wing American fighter, made its name in Korea shooting down a bunch of Mig-15s
which were the Soviet Union's equivalent new swept wing jets. Internet
discussion about the kill ratio can make for hours of interesting reading.
Served in many other countries, in Asia and Europe, and with some for many many
years after it went out of American service. Some of the early astronauts,
including John Glenn, flew Sabres. A lovely, graceful jet which I (too young to
have seen them during their active years) remember fondly from some airshows in
the 80s and 90s
With Sabre kits, the thing to look out for is the different type of wing - as
far as I know this kit has the proper wing for its chosen German and Japanese
variants, but if you're worried about that, there is a wealth of expertise
(amongst the wealth of not-so-expertise) out there on the internet, so ask
someone you think knows their stuff.
ModelingMadness
previewed this kit and its related F-86F-30 variant a while back. I will
shamelessly lift from those to tell you that detailing is of the engraved type
with panel lines and some rivet detail. Wheel wells and speed brake interiors
have detail and are reasonably deep, the front well however appears a little too
wide.
The cockpit is reduced to a tub, which also has the upper half of the intake
moulded to its bottom, side consoles have no detail and no decals are provided
either. Added to this are a stick and seat, the instrument panel is moulded with
the fuselage, again with no detail or decal. Some gun sight detailing is also
provided, as is some for the area under the canopy behind the seat. The sin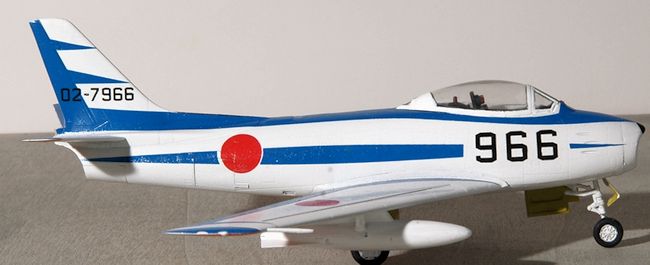 gle
piece canopy is very clear but it has a couple of large mounting tabs that will
probably be seen from the outside once it is attached.
gle
piece canopy is very clear but it has a couple of large mounting tabs that will
probably be seen from the outside once it is attached.
There is a seam that runs the length of the upper fuselage that will need
sanding down. The parts for the undercarriage are reasonably detailed, however
there are moulding pips and seams to remove. The front wheel is formed with the
leg and the main wheels are simplified. Door inner faces also are detailed but
ejection pin marks are present on the main doors. A strange thing with these
doors is that one has a single mounting tab and the other has two, this is
probably to ensure no mixup in construction. This will add some work to cover
these up. Larger than necessary attachment points are used for the U/C and other
assemblies but these are part of the simplification of these kits, in some ways
they are part push together, so be prepared for a struggle to separate parts if
you dry fit them.
Underwing items are just a pair of drop tanks, their sway braces have large
attachment points to the tanks and these are areas that will need filling.
The decal sheet is well printed and in register. Two markings choices are
provided.
 I started on
the cockpit. What, you say? Where do I get off taking such a rebellious,
unorthodox approach to modelling? Well, that's the way I roll. Just deal with
it, man.It's simple, with a seat, stick, and instrument panel. It doesn't look
too bad once it's painted though
I started on
the cockpit. What, you say? Where do I get off taking such a rebellious,
unorthodox approach to modelling? Well, that's the way I roll. Just deal with
it, man.It's simple, with a seat, stick, and instrument panel. It doesn't look
too bad once it's painted though
Being a simple HobbyBoss Easy-Build kit, there isn't much to report on the
construction front. You need to spend a bit of time dealing with the mould seam
on the spine of the plane, but the parts all fit together well and there is
little by way of post-construction clean up. The main joins are fine and I
didn't bother with any filler.
After the painting - see below - there's just a few bits to add. The drop tanks
come with the sway bar moulded on (I'm referring to the extra bar holding the
rear of the tanks on, I think that's what it's called). The undercarriage is
rugged and fits positively, as do the wheel bay doors. The canopy also fits
nicely.
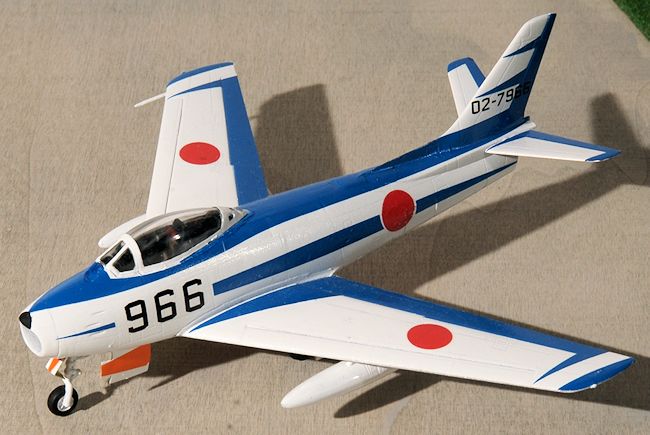
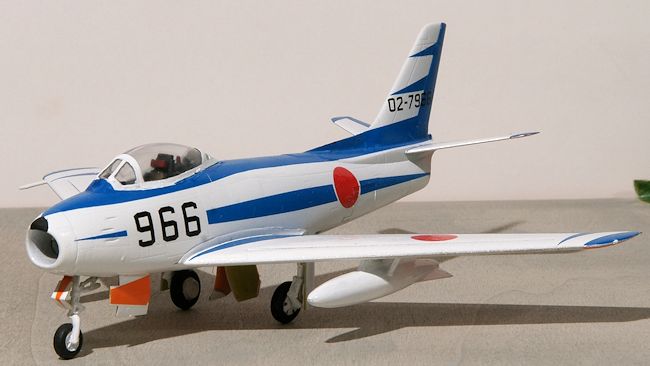
You get two options - a Luftwaffe example from the Richthofen wing, JG71, and a
jet from the Japan Air Self Defence Force (JASDF) "Blue Impulse" display team.
That's a white aircraft, and unlike many kits of
 display team
aircraft (hello, Trumpeter), you actually get decals for all the necessary
colours. No masking weird contours and curves on this thing - thank goodness!
display team
aircraft (hello, Trumpeter), you actually get decals for all the necessary
colours. No masking weird contours and curves on this thing - thank goodness!
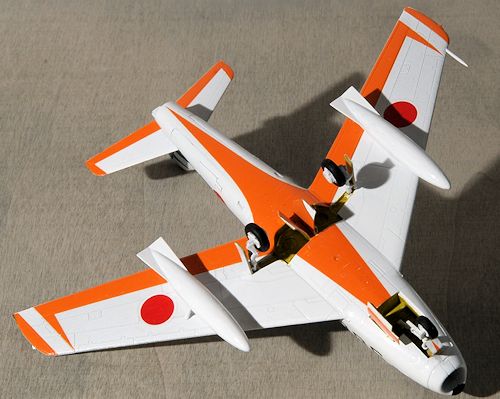
I went with the Blue Impulse version, as you can see, and made a little bit of a
mess with the white undercoat. The plastic is in light grey, and I guess I
wasn't very good at using my spray can (Tamiya Gloss White). It doesn't stand up
too well to close inspection though it looks better in these pictures.
Decal application was fairly straightforward but these HobbyBoss decals, as much
as I like them, are a bit sticky. They don't like to move once they are on the
surface of the model so it's important to place them as accurately as you can in
the first place. They respond nicely to Mr Mark Softer and especially on the
orange underside you can really see them sink into the surface. One of the long
blue side stripes cracked in the water and I had to piece the fragments
together. You get every single marking as a decal, so you really can simply
paint this white. I didn't use a single piece of masking tape.
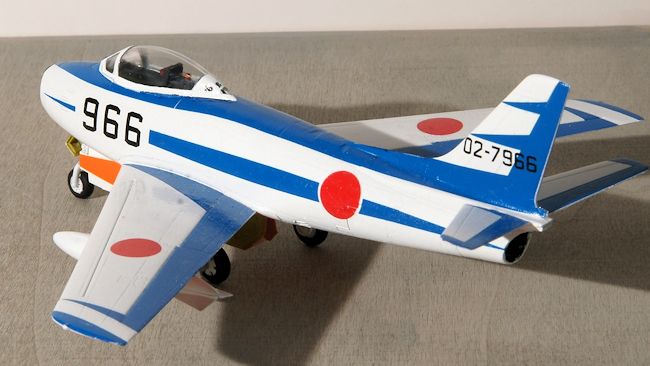
For a guy who wouldn't say he is super into Sabres, I now have three on my shelf
- this one, the Fujimi RF-86 I mentioned and also the classic Heller "Mig Mad
Marine". Each has its ups and downs (Heller,
 though older
and with raised details, does look great and is still worthwhile, but I think
the Fujimi looks best overall). This particular kit looks great at shelf
distance but obviously doesn't quite stack up against the others closer up,
mainly because it has ever so slightly clunkier detail around the wheel area.
But for the price, and the ease of construction, and the great decals, I would
warmly recommend this kit especially if you need to pump out a quick completion
to take your mind off whatever it is that makes your Shelf of Doom sag with the
weight of unmitigated despair.
though older
and with raised details, does look great and is still worthwhile, but I think
the Fujimi looks best overall). This particular kit looks great at shelf
distance but obviously doesn't quite stack up against the others closer up,
mainly because it has ever so slightly clunkier detail around the wheel area.
But for the price, and the ease of construction, and the great decals, I would
warmly recommend this kit especially if you need to pump out a quick completion
to take your mind off whatever it is that makes your Shelf of Doom sag with the
weight of unmitigated despair.
And, of course, for younger modellers (in years or in experience) this is a
great place to start - easy to build, and looks good, and comes with all the
decals you need so there's no advanced painting required.
http://en.wikipedia.org/wiki/Blue_Impulse
Richard F
January 2015
If you would like your product reviewed fairly and fairly quickly, please
contact the editor
or see other details in the
Note to
Contributors.
Back to the Main Page
Back to the Review
Index Page