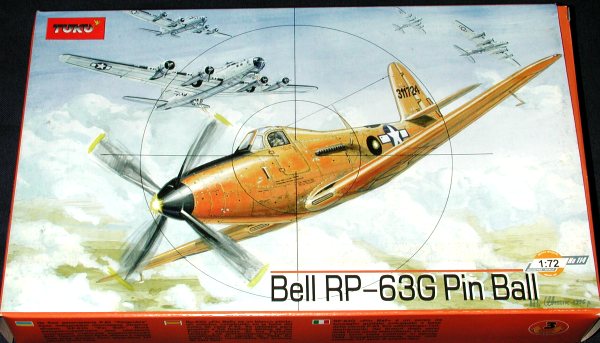
Toko 1/72 RP-63G 'Pinball'
|
KIT # |
114 |
|
PRICE: |
$7.98 |
|
DECALS: |
Two (three) aircraft |
|
REVIEW & |
|
|
NOTES: |
|
|
BACKGROUND |
For a look at the kit and a history of the RP-63, please follow this link.

|
CONSTRUCTION |
Though the Toko kit is ostensibly a kit from an major plastics company, it is really best looked upon as a short run kit. In that way, there will be no disappointments when things don't turn out to be a good as originally expected. Right from the start, I could see that this wasn't going to be a walk in the park. The first thing I did was to build up the interior parts. The kit instructions are a trifle vague on the fit of some of the parts, particularly the various bulkhead pieces and the instrument panel. After getting the majority of cockpit pieces together, I installed it into a fuselage half. The forward section of this assembly is the nose wheel well. After getting it to where it would fit, I discovered that the whole thing was either too long or that I needed to do major work on it. The attachment point for the nose gear was too far forward and there was no way the gear would get to it. Yet the seat and aft nose well bulkhead were right where they were supposed to be. The instrument panel was also too far forward and would not allow the fuselage halves to close, so the panel was removed.
 Not a very auspicious start, but normal for many short run kits.
I added a bunch of weight to the nose area and then started gluing the fuselage
in sections. During this procedure, I went to work on the wings. These fit well
but have trailing edges that are way too thick. The process of thinning down the
wing was more work than I was willing to put into it so I left it as is. Face
it, there will be no laminar flow on this Kingcobra!
Not a very auspicious start, but normal for many short run kits.
I added a bunch of weight to the nose area and then started gluing the fuselage
in sections. During this procedure, I went to work on the wings. These fit well
but have trailing edges that are way too thick. The process of thinning down the
wing was more work than I was willing to put into it so I left it as is. Face
it, there will be no laminar flow on this Kingcobra!
Back at the fuselage, the lower underside piece (the one without the strake) was glued in place as was the rest of the fuselage. The upper 'hoop' over the seat didn't want to join smoothly so it was superglued. I envision problems getting the clear bits to match on this one. On the RP-63, there is no aft window and no protruding engine intake scoop. Both of these areas are armored and solid but for a thin slit for cooling air to enter. On all but the first couple of RP-63s, there was a small scoop placed over the cooling air slit to improve engine cooling. You'll have to add that to this kit if you want to do any other than the first two RP-63s as it isn't included in the kit.
The area that replaced the back glass was a particularly poor fit. Perhaps due to the poor fit of the upper fuselage, it was too narrow and required many filler applications to fix. Most of the other joins needed filler as well. At this time, the wing was added. It fit quite well on the upper side with the usual filler on the lower sections. The lower forward section in particular was too thick and a step was there. The leading edge cooling slots (a separate piece) helped somewhat, but this piece was too shallow and needed much filler on the gaps.
 Then I returned to the interior and tried to
find a good way to install the instrument panel. I finally ended up just
sticking it in there as best as I could. This was mainly because the panel
attachment point was way too far forward. At this time any additional painting
on the interior was done. It was then on to the tail planes. These fit
better than I could have hoped and needed little filler; the best fitting part
of the kit so far.
Then I returned to the interior and tried to
find a good way to install the instrument panel. I finally ended up just
sticking it in there as best as I could. This was mainly because the panel
attachment point was way too far forward. At this time any additional painting
on the interior was done. It was then on to the tail planes. These fit
better than I could have hoped and needed little filler; the best fitting part
of the kit so far.
It was now time for the clear bits. Man, what a mess these were. Not only are the frames for the windscreen WAY too thick, but the assembly just didn't want to fit. Stepping back, I figured I'd go for the doors. They are too large for the opening. Some trimming of both doors and doorway were needed to get even an acceptable fit. A lot of muttering and grumbling accompanied this. I then started trimming away at the canopy part before it would finally fit. Much filler and sanding was needed where it attached to the back section. I'd have hated to have to do this with the clear backlight! With that finally in place, it was time to mask the canopy. At this stage I found that the framing for the windscreen piece was about 10 times too wide. I then masked what I thought was appropriate, realizing that the 'clear' parts would have rather marked step in them, but the other choice was to have it just look bad.
|
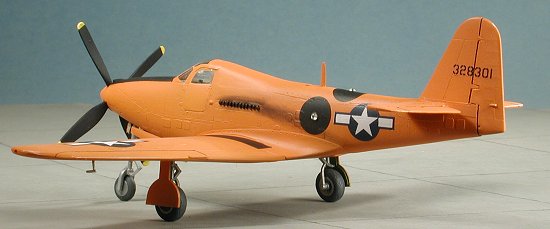
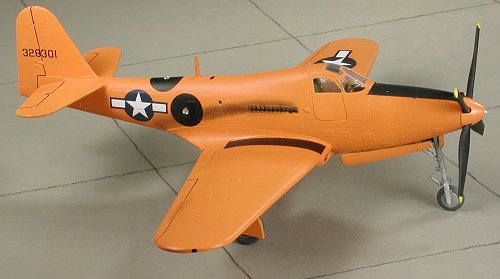
PAINT |
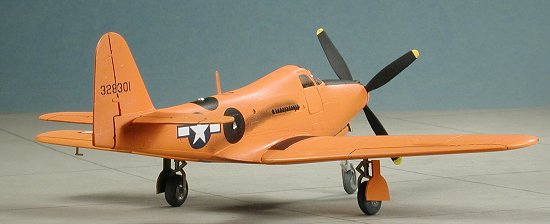
 These planes came basically in two colors; yellow and orange. The idea was to
make them easy for gunners to see, something that the Luftwaffe was not so kind
enough to do!! As with all these kinds of bright colors, I used Floquil Reefer
white as an undercoat and then buffed it a bit with an old rag to knock off the
'matteness' of the paint. I then used some Xtracolor gloss Orange mixed with a
bit of Floquil Reefer white to lighten it up a bit. This stayed pretty gloss and
went on quite easily. These overall color schemes are really easy to paint!
When it was dry, the anti-glare panel was painted flat black and I returned to the workbench to add some more bits before
continuing.
These planes came basically in two colors; yellow and orange. The idea was to
make them easy for gunners to see, something that the Luftwaffe was not so kind
enough to do!! As with all these kinds of bright colors, I used Floquil Reefer
white as an undercoat and then buffed it a bit with an old rag to knock off the
'matteness' of the paint. I then used some Xtracolor gloss Orange mixed with a
bit of Floquil Reefer white to lighten it up a bit. This stayed pretty gloss and
went on quite easily. These overall color schemes are really easy to paint!
When it was dry, the anti-glare panel was painted flat black and I returned to the workbench to add some more bits before
continuing.
|
MORE ASSEMBLY |
Now that the kit was pretty well painted, it was time to put it on its wheels. The gear legs had been painted aluminum as had the wheels, though it looks as if they could just as easily been painted neutral grey or even chromate. The nose gear needed a new mounting hole drilled and once that was done, it was glued in place. The main gear seemed too short once installed, but they fit well. The nose gear then had the retraction strut glued in place and it made for a very stable construct. At this time, the wheels were glued on. The nose gear fit quite well, but the main gear needed to have the wheels drilled out quite a bit to get them to fit on the kit axles.
 Once on, the gear
doors were separated. The plastic for these is VERY thick and way over scale The
nose gear doors fit fairly well, but the main gear was a problem. You see, they
give three doors per side. The small outer doors wouldn't fit into the gear
wells because of the thickness. So I left them off and just glued on the main
outer doors. You are also given inner doors, but the wing underside has no place
to put them. The wheel wells on the lower wing are circular as in a Bf-109E. To
install the inner doors, one would have to hack away at the lower wing area to
open it up. Then you'd have to shorten the inner doors as they are too big for
the opening. I took the coward's way out and left things as they were. To
summarize, I ended up using only one of the three main gear doors, and it all
looks fairly good, though I'm sure that Kingcobra experts are cringing about
this time.
Once on, the gear
doors were separated. The plastic for these is VERY thick and way over scale The
nose gear doors fit fairly well, but the main gear was a problem. You see, they
give three doors per side. The small outer doors wouldn't fit into the gear
wells because of the thickness. So I left them off and just glued on the main
outer doors. You are also given inner doors, but the wing underside has no place
to put them. The wheel wells on the lower wing are circular as in a Bf-109E. To
install the inner doors, one would have to hack away at the lower wing area to
open it up. Then you'd have to shorten the inner doors as they are too big for
the opening. I took the coward's way out and left things as they were. To
summarize, I ended up using only one of the three main gear doors, and it all
looks fairly good, though I'm sure that Kingcobra experts are cringing about
this time.
|
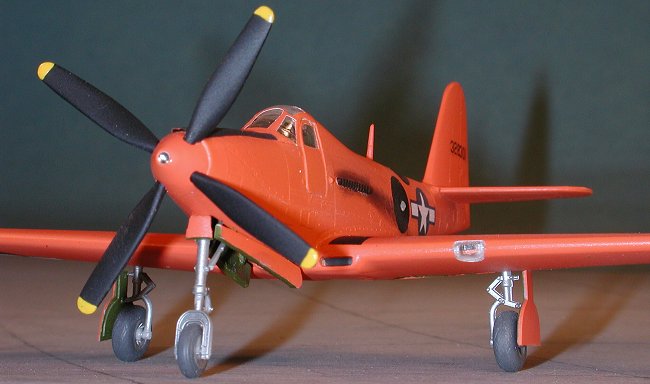
DECALS |
OK, so now the kit was close to being ready for decals. Thanks to the gloss
Xtracolor paint, no gloss coating was needed. However, I had a big problem. I
couldn't find the decals. This was not good. Hunt mightily for them I did,
making what is usually a mess into an even more daunting pile of modeling
paraphernalia. Exhausting all of my efforts, I had to find an alternative. I was
pretty well stuck into doing an RP-63 because of all the mods. Fortunately,
these planes were pretty bland for the most part, carrying naught but serial
numbers and insignia. I scrounged the insignia from a Scalemaster sheet that is
quite old, but still useful. The serials came from one of the myriad kit decal
sheets that I've been hoarding since day one
 and are courtesy of the old Revell
1/72 P-38J kit. Not exactly a P-63 serial, but close enough. I also got some
black stripe decals for the wing walk areas.
and are courtesy of the old Revell
1/72 P-38J kit. Not exactly a P-63 serial, but close enough. I also got some
black stripe decals for the wing walk areas.
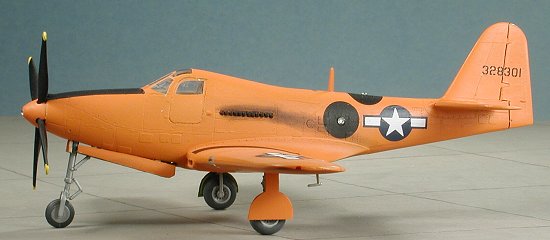
It was the 'light' decals that would be a problem. After some thought, I decided to snoop through my collection of MV lenses to see just what I could find. Lo and behold, I found a set that looked promising. One was test fit into the nose spinner and looked perfect for the job. I then got out my drill and lightly drilled three depressions on the fuselage for the lenses. Digging deeply into my decal stash, I found some black circle decals that looked about the right size and placed each one over the depressions I had just drilled. A dose of Solvaset made sure the decals were going nowhere. When dry, the area for the lens was carefully scraped away.
|
LAST BITS |
At this time, I added the radio mast, the pitot tube and the oleo scissors for the nose gear. Then I got the landing light out. It was no surprise to me that it was too large for the opening in the wing. However, I am deft with an Xacto so a few minutes carving had the wing area the right size for the light. Before attaching it or the MV lenses, the kit was given a coat of clear matte. Then the lenses and the landing light were glued in with non-fogging superglue. Some exhaust staining was done and the masking taken off the clear parts. I'd managed to sand off the wing tip lights, but a drop of the proper colors made it look like something was there and the kit was finished.
|
CONCLUSIONS |
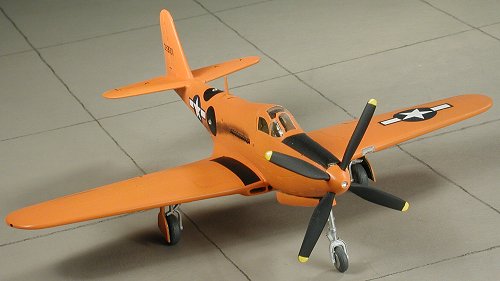
Toko/Roden kits have a very checkered history. Some are jewels and some are doo-doo. This one comes awful close to the second category. The only benefit it has over the Aoshima kit that I built many years ago is that it is at least up to modern standards in terms of detailing, but that is it. I'm glad that I built it as it does look a lot more like a P-63 than the Aoshima version and the orange color stands out. Build another? Can't say I'm inclined to do so.
May 2002
Review kit courtesy of my kit collection.
Copyright ModelingMadness.com. All rights reserved. No reproduction in part or in whole without express permission from the editor.
If you would like your product reviewed fairly and quickly, please contact the editor or see other details in the Note to Contributors.