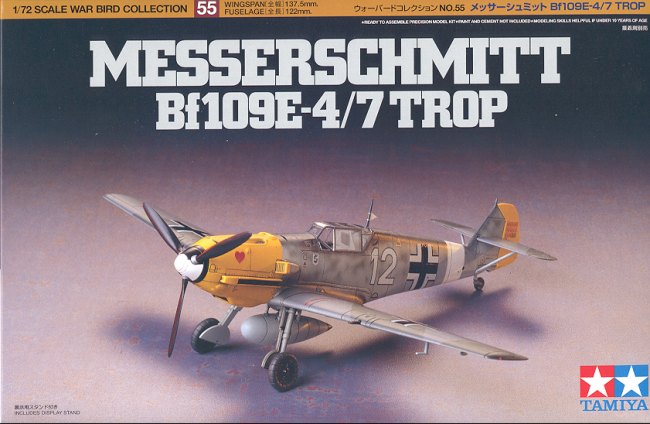
Tamiya 1/72 Bf-109E-4/7
|
KIT # |
60755 |
|
PRICE: |
$16.50 |
|
DECALS: |
Three aircraft |
|
REVIEWER: |
|
|
NOTES: |
|
BACKGROUND |
For a look at what is in the box and and a brief history, please visit the preview.
|
CONSTRUCTION |
Many of you are probably aware that the ONLY difference in the
plastic between this and the Bf-109E-3 kit are the clear bits. From the
standpoint of the number of different variants, this kit offers a lot more
options. Those include bomb and drop tank, as well as three different spinners.
Meanwhile, the wings were glued together after I opened the
holes for the drop tank or bomb rack. In this case it would be the bomb rack.
Then the mating surfaces were cleaned up. The cockpit was glued into the
fuselage and the wings glued on. Fit is really very good with only a touch of
filler needed at the rear wing/fuselage join. Next the tail planes were
attached, but not the braces. The canopy and windscreen were masked and the
windscreen glued in place. The gunsight was next and when dry, the canopy tacked
in place. The lower cowling was then next to be assembled, but not glued in
place.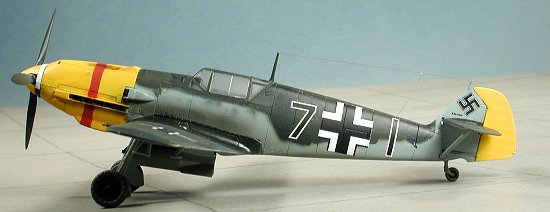 Construction started with the cockpit (not very original, but there it is). I like to glue together as many parts
together prior to painting as I can. In this case it was basically the seat and
control stick. The tub as well as forward bulkhead and cockpit sidewalls were
painted RLM 02 grey as was normal with these early 109s. I used Xtracolor to do
this. Next the instrument panel was painted RLM 66 and when dry, the panel
decals were placed over it. A touch of Champ after it was pretty well set
allowed it to snuggle down. Then the sidewalls were painted various colors
according to the instructions and dry brushed. A decal harness is provided and
that was put in place.
Construction started with the cockpit (not very original, but there it is). I like to glue together as many parts
together prior to painting as I can. In this case it was basically the seat and
control stick. The tub as well as forward bulkhead and cockpit sidewalls were
painted RLM 02 grey as was normal with these early 109s. I used Xtracolor to do
this. Next the instrument panel was painted RLM 66 and when dry, the panel
decals were placed over it. A touch of Champ after it was pretty well set
allowed it to snuggle down. Then the sidewalls were painted various colors
according to the instructions and dry brushed. A decal harness is provided and
that was put in place.
|
PAINT |
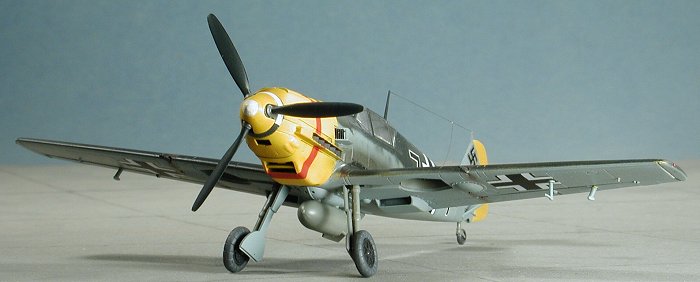
The first painting was done at this time. This consisted of the using Floquil Reefer White for the rudder, spinner, and cowling parts. This also included the nose. When dry, they were painted with Polly S #4 Yellow Acrylic. The next day, the nose section was masked and the lower part of the aircraft was painted RLM 65 along with the outer part of the gear doors. After drying, the underside of the tail planes were masked and the upper surface painted RLM 71. Again, it needed to dry and then it was masked and RLM 70 sprayed on. I used Aeromaster enamels for all the major airframe colors. The guide used for this was the instruction sheet for the aftermarket decals.
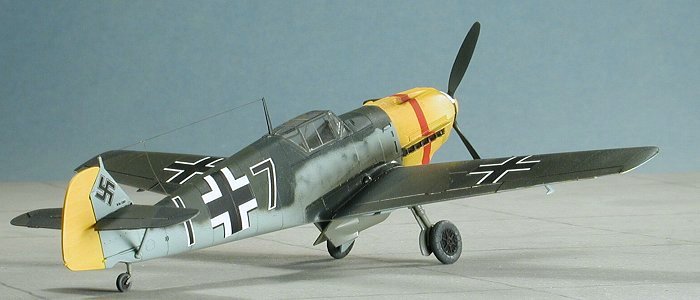
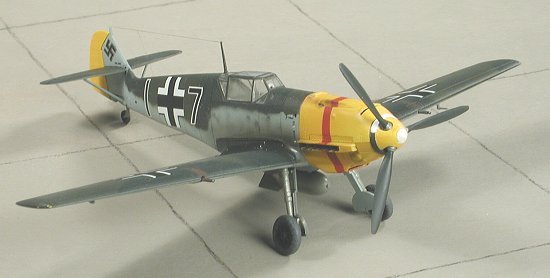 I used Aeromaster
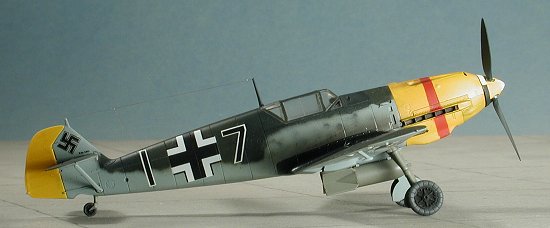
72-003, Battle of Britain for the scheme of this plane. I chose Black 7 from
JG 53 with the red stripe on the yellow cowling. Though it is a fetching scheme,
it isn't the easiest to paint. This was brought home to me when I tried to paint
the red stripe on the cowling. With all of those lumps and bumps, it didn't turn
out as well as I'd have hoped. To add to it, I managed to spill RLM 70 on the
cowling parts. Out came the Strip A Kit and after a very short period, the old
paint was removed and the cowling repainted. The second attempt at the red
stripe was not much more successful than the first. Touch-up helped some, but
the next time, I'll use a decal for this.
I used Aeromaster
72-003, Battle of Britain for the scheme of this plane. I chose Black 7 from
JG 53 with the red stripe on the yellow cowling. Though it is a fetching scheme,
it isn't the easiest to paint. This was brought home to me when I tried to paint
the red stripe on the cowling. With all of those lumps and bumps, it didn't turn
out as well as I'd have hoped. To add to it, I managed to spill RLM 70 on the
cowling parts. Out came the Strip A Kit and after a very short period, the old
paint was removed and the cowling repainted. The second attempt at the red
stripe was not much more successful than the first. Touch-up helped some, but
the next time, I'll use a decal for this.
I then masked off the tail and wings completely. The fuselage side camo isn't exactly as shown on the 8 year old Aeromaster sheet. The latest Classic 'Jagdwaffe' book shows this plane and has a more up-to-date profile. It shows the upper fuselage colors carrying farther down the fuselage. The mottling is quite light so after the usual mottling job, the area was lightly over-sprayed with RLM 65. The effect works quite well.
|
PUTTING ON MORE BITS |
With most of the colors now on the plane, it was returned to the
work bench. Here the wheel wells and landing gear were painted RLM 02. Yeah, I
used a brush on these bits as they really don't need to be airbrushed. When dry,
the gear legs had the oleos wrapped in Bare Metal Chrome Foil. They were then
glued into the fuselage along with the tail wheel. The main wheels were attached
to the gear once it was dry. 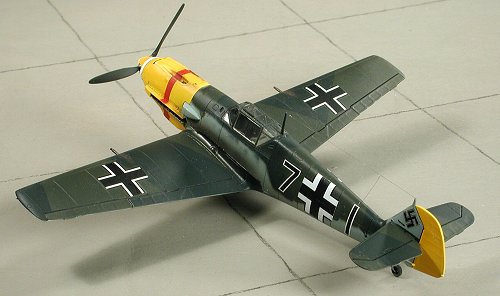
|
MORE PAINT
& |
After a short drying period, the kit was returned to the paint shop. Here it was given a coat of clear gloss using Future acrylic in preparation for the decals. While here, the inside of the gear doors and the bomb were painted RLM 02. Then it was back to the bench and the decals.
One thing I noticed about these decals is that they were not a thin as some of the newer ones. In fact, they really didn't seem to want to work as well as I had hoped. Using the normal mild setting solution had no effect on them and I had to resort to Solvaset and even Champ to get them to snuggle down. Eventually, they were all put on.
|
BACK TO WORK |
Now that I had a decaled plane, I added all the final little bits. This included the guns, antenna mast, pitot tube, aileron mass balances, stab struts, and gear doors. The prop hub had its tip painted white. Some references show this hub as being red with a yellow tip; your choice on this one. I started to remove the canopy to install the head armor. Unfortunately, it was tacked a bit more than I thought and I couldn't get it to come free. Though the aft sections of the canopy are separate, they are not designed to be opened. You basically get a two-piece canopy assembly and should have a three. If you want it open, you'll have to cut the canopy clear from the back piece.
 It was at this time, when the kit was nearly ready for the final matte clear
coat that the second disaster happened. I had the kit placed too close to some
precariously balanced boxes. Naturally, I bumped the table too hard and they
came crashing down on my poor 109! SPLAT! Off went the landing gear, radio mast
and the little thingies under the wings. I found them all and reattached them,
but the model just won't be the same. SIGH!
It was at this time, when the kit was nearly ready for the final matte clear
coat that the second disaster happened. I had the kit placed too close to some
precariously balanced boxes. Naturally, I bumped the table too hard and they
came crashing down on my poor 109! SPLAT! Off went the landing gear, radio mast
and the little thingies under the wings. I found them all and reattached them,
but the model just won't be the same. SIGH!
The kit then had a bit more touch-up done where the re-gluing occurred and then it was sprayed with a clear matte. The masking was removed from the clear bits and pastels used to provide some gun staining while I tried Tamiya Smoke for the exhaust. The jury is still out on this as I'm not sure I like it as much as pastels. A radio wire was then made from hair and the prop pushed onto the nose. Finally, the bomb was glued in place and the model was now done.
|
CONCLUSIONS |
For some reason, this kit didn't go as smoothly as the Bf-109E-3 built last year. Not really sure why. The end result isn't that bad, but it isn't anything I'd take to a contest, that's for sure. Still, it is a great kit and if you aren't as ham-fisted as I you should be able to make it into a superb model.
July 2002
This kit purchased for your reviewing pleasure.
If you would like your product reviewed fairly and quickly, please contact me or see other details in the Note to Contributors.